
Start with a template that matches what you need to collect, then change its questions and introduction for your audience. These three examples cover customer feedback, business enquiries and event planning. All three templates and their question types are included on Free. You can try the Customer feedback, Contact form and Event RSVP previews before using them; preview answers are not saved.
Collect customer feedback
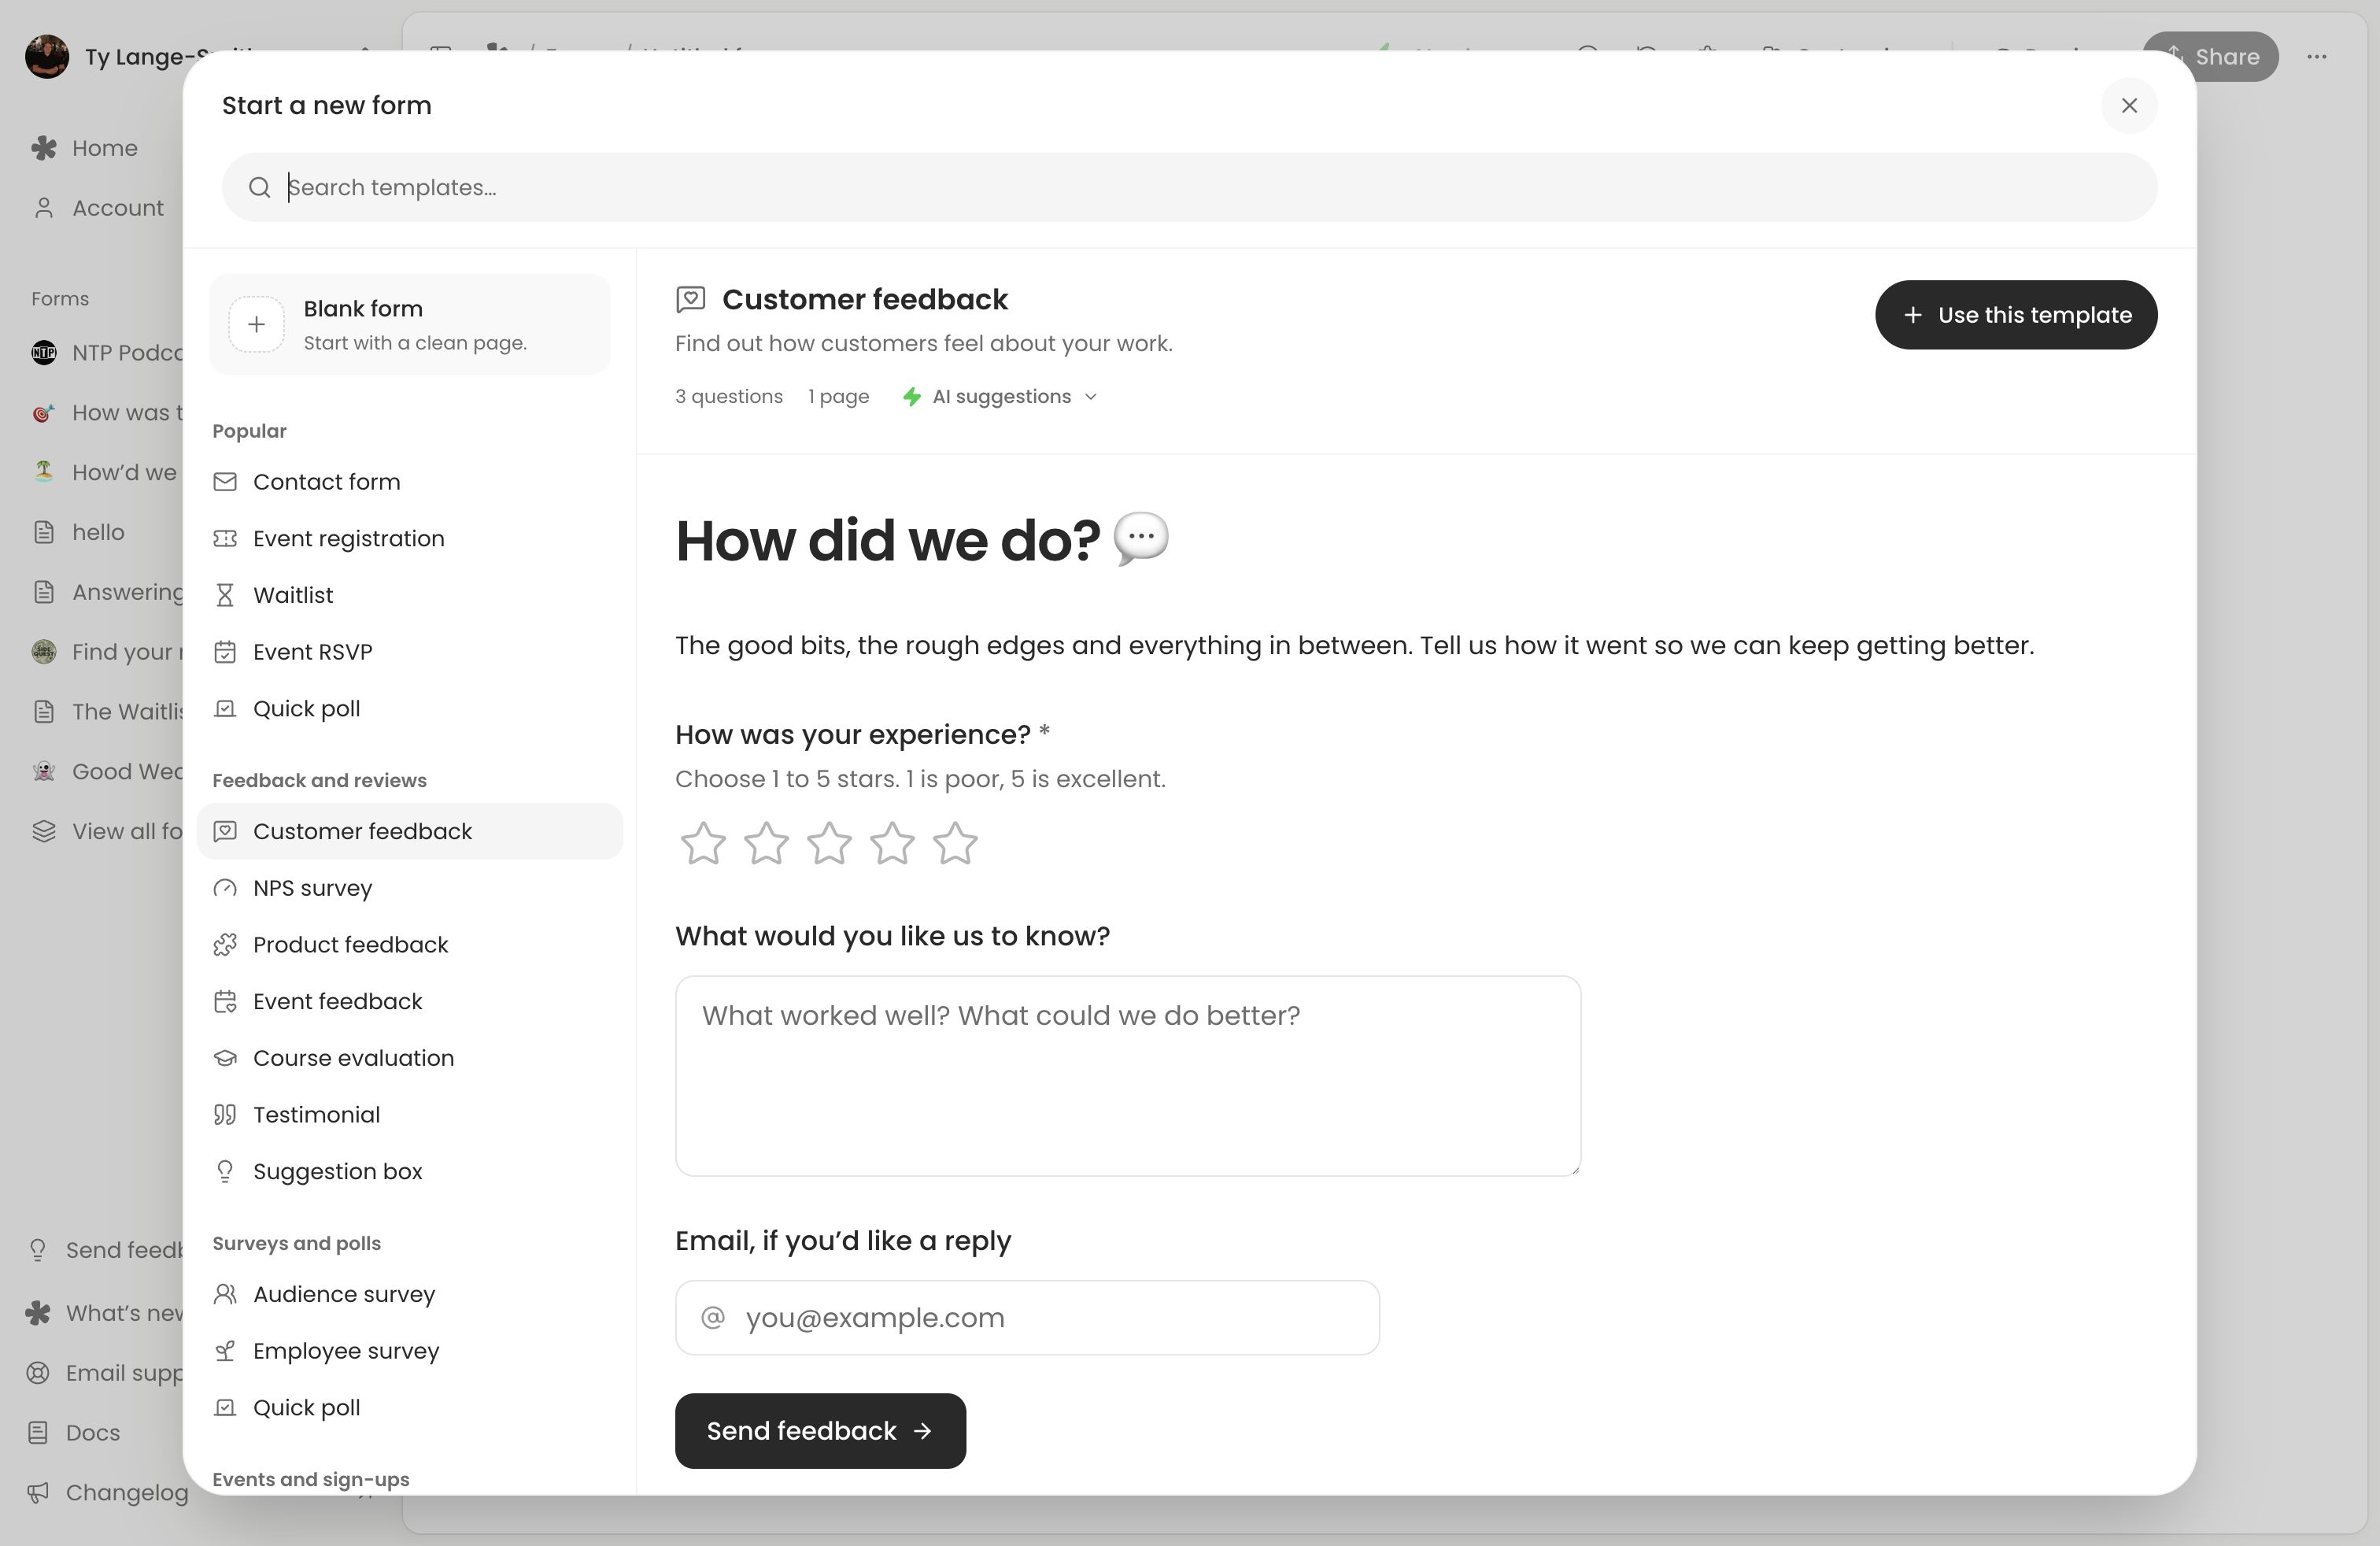
- Open the Customer feedback template and choose Use this template, or choose New form, then Customer feedback in the app.
- Change the title to name the experience, such as “How was your workshop?” and say who reads the feedback.
- Keep How was your experience?, the five-star rating. Its description explains that 1 is poor and 5 is excellent.
- Adapt What would you like us to know? to a focused prompt: “What helped most, and what should we change next time?”
- Keep Email, if you’d like a reply optional if you want people to choose whether you follow up.
The template starts with written feedback. To invite voice too, add a voice question and enable its typed alternative in question settings. For a simple invitation, use one feedback question rather than asking people to repeat the same answer in both formats.
Add a Sentiment AI column reading the written feedback and rating, and Needs reply if you want to find unresolved problems. The template suggests these columns; set them up through AI columns. A recording contributes no audio content to AI, while its typed alternative can be read.
Publish the complete form, submit a test and find it in Responses. Then put the link in your workshop follow-up or customer email. Review the actual negative feedback and requests for help before deciding what to change or who to contact. On Creator, add a hidden Source field and make a pre-filled link for each invitation, such as a follow-up email and a poster QR code.
Collect business enquiries
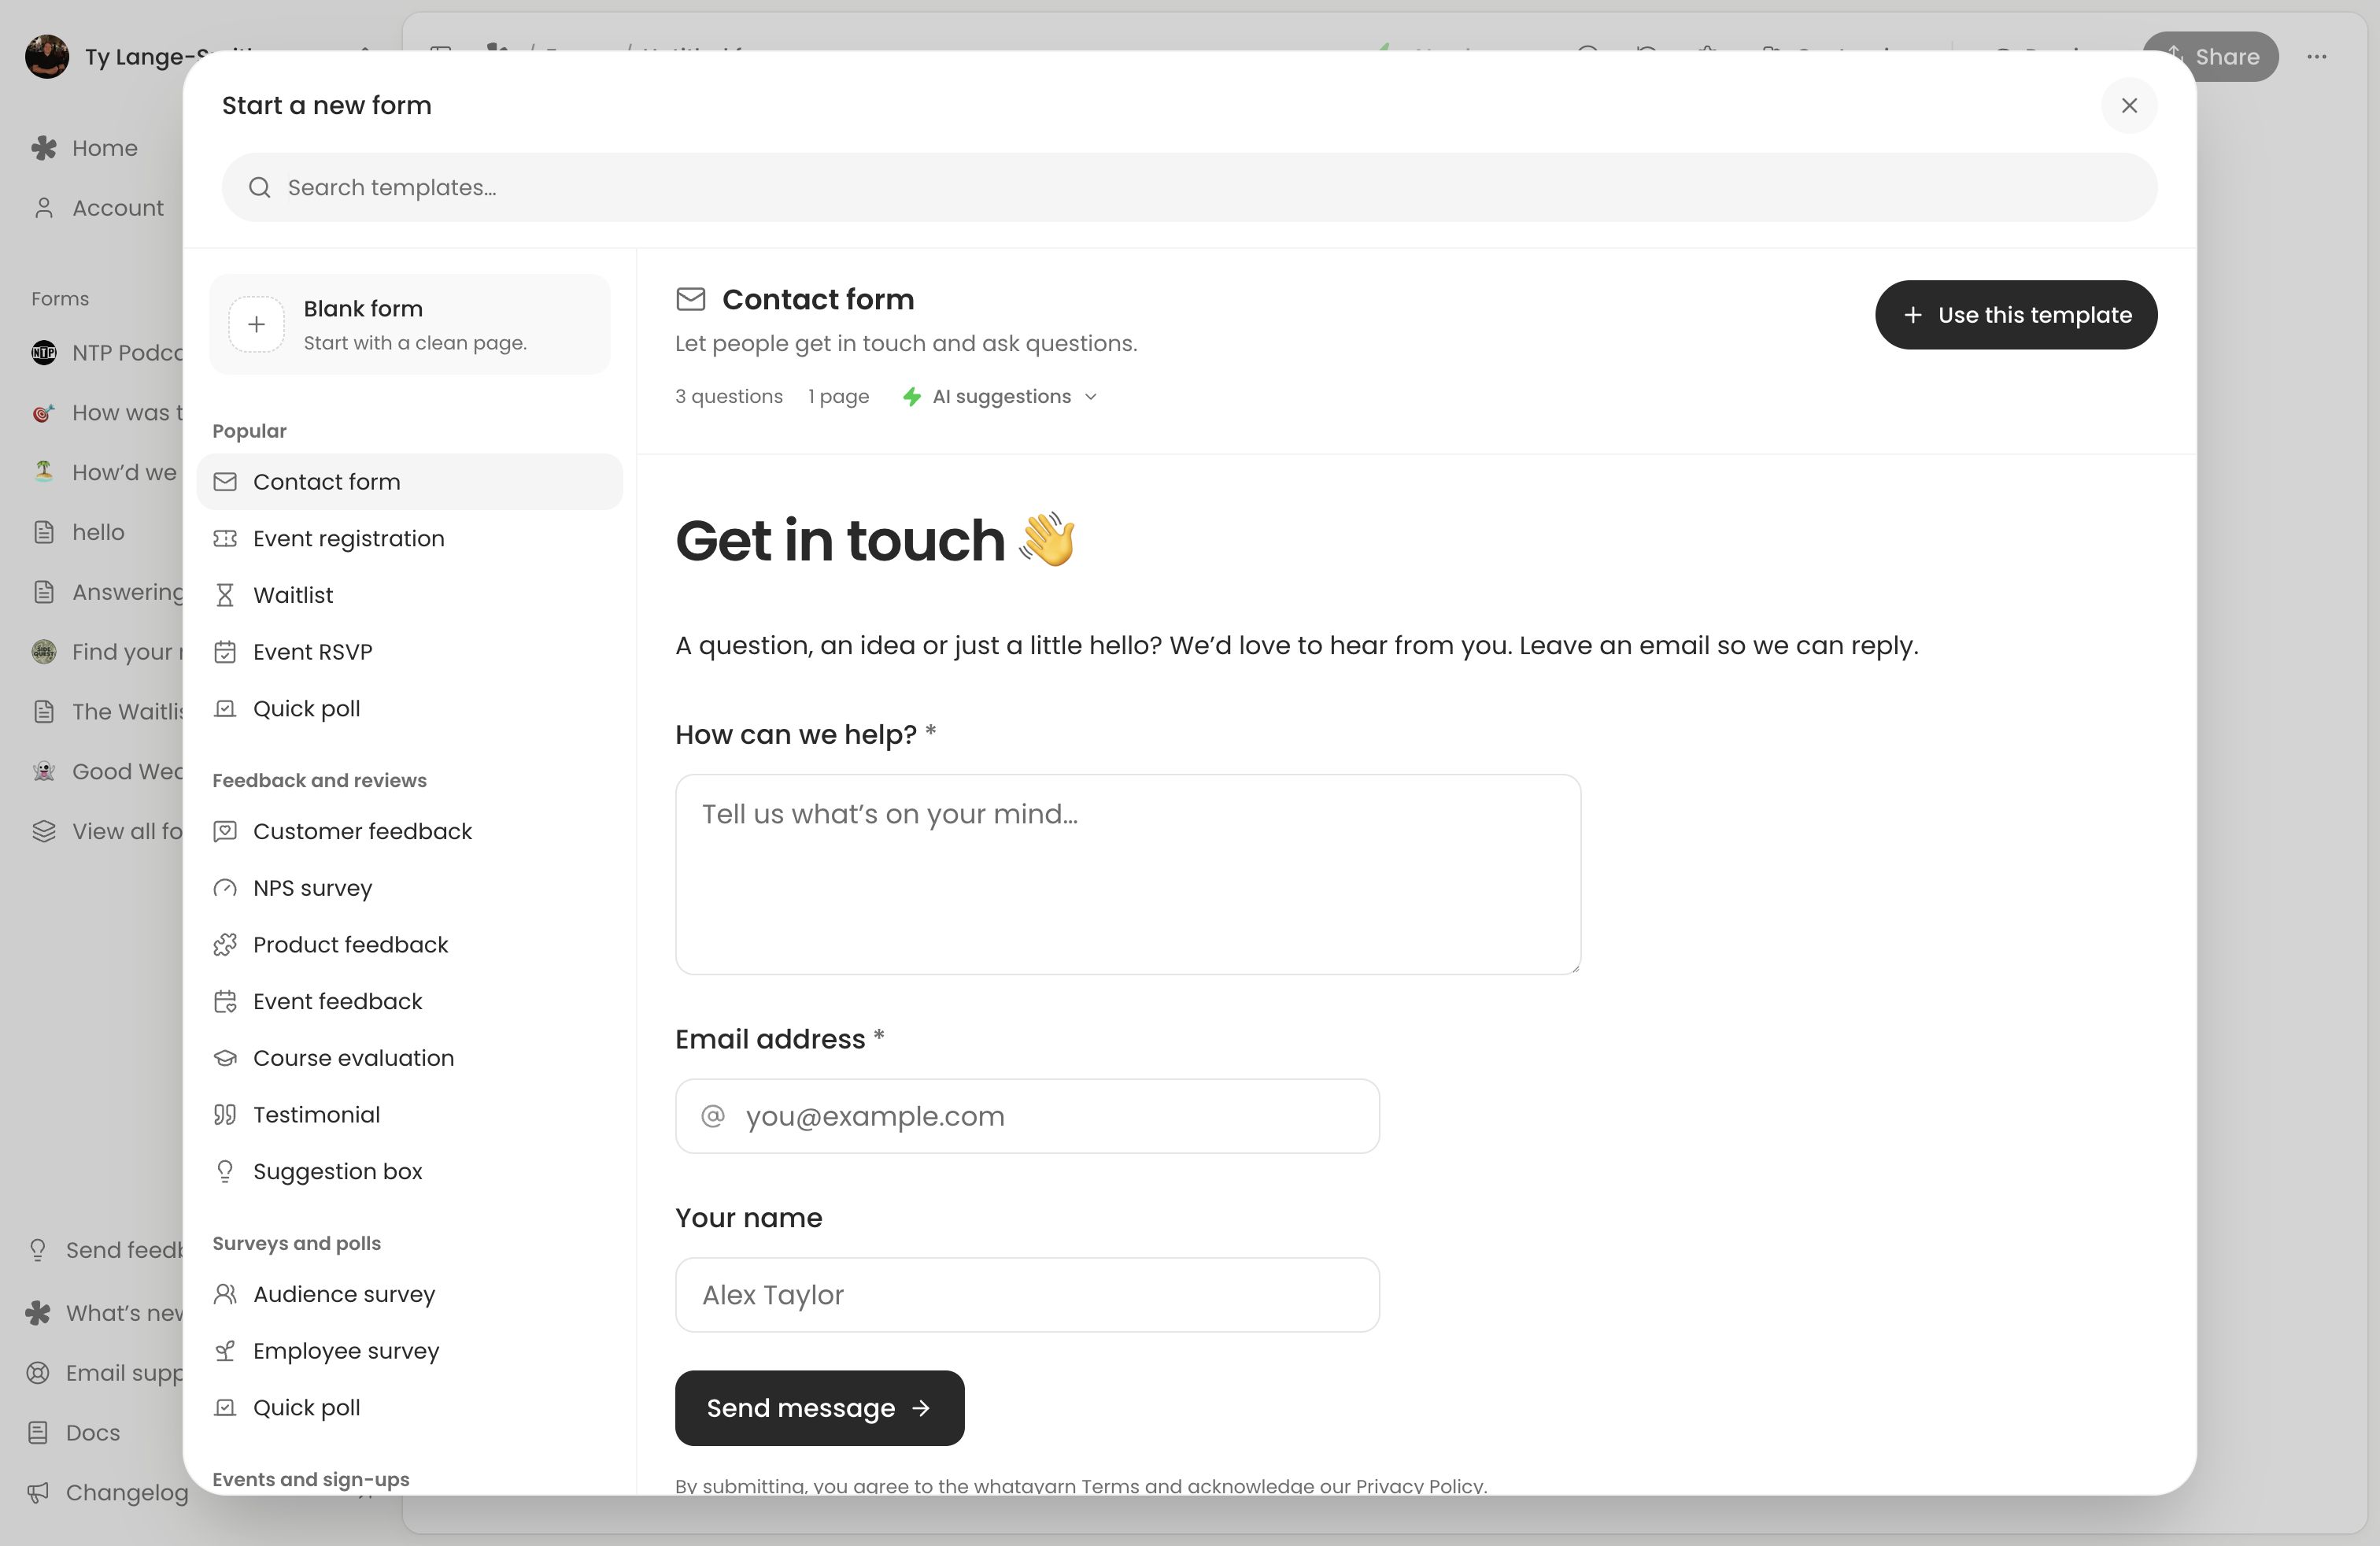
Start with the Contact form template for a short request. It already includes a required How can we help? written answer, a required Email address and an optional Your name.
Change the introduction to set expectations, for example:
Tell us what you need a hand with. We read enquiries on weekdays and reply by email.
Only promise a response time you can meet. Add a timing question if deadlines matter, or use the Project brief template for a more detailed project request. Keep required questions limited to what you need to handle the enquiry.
Add Needs reply using the request as a source. Add Urgency if the request or a timing question describes deadlines. Neither column sends an email; reply through your usual email workflow using the contact details provided. Creator can add an Enquiry type column with custom answers such as New project, Existing work and General question.
Share the link from your contact page, or embed the form. Test a complete request from the live page and check the notification setting in Settings.
Plan an event with RSVPs
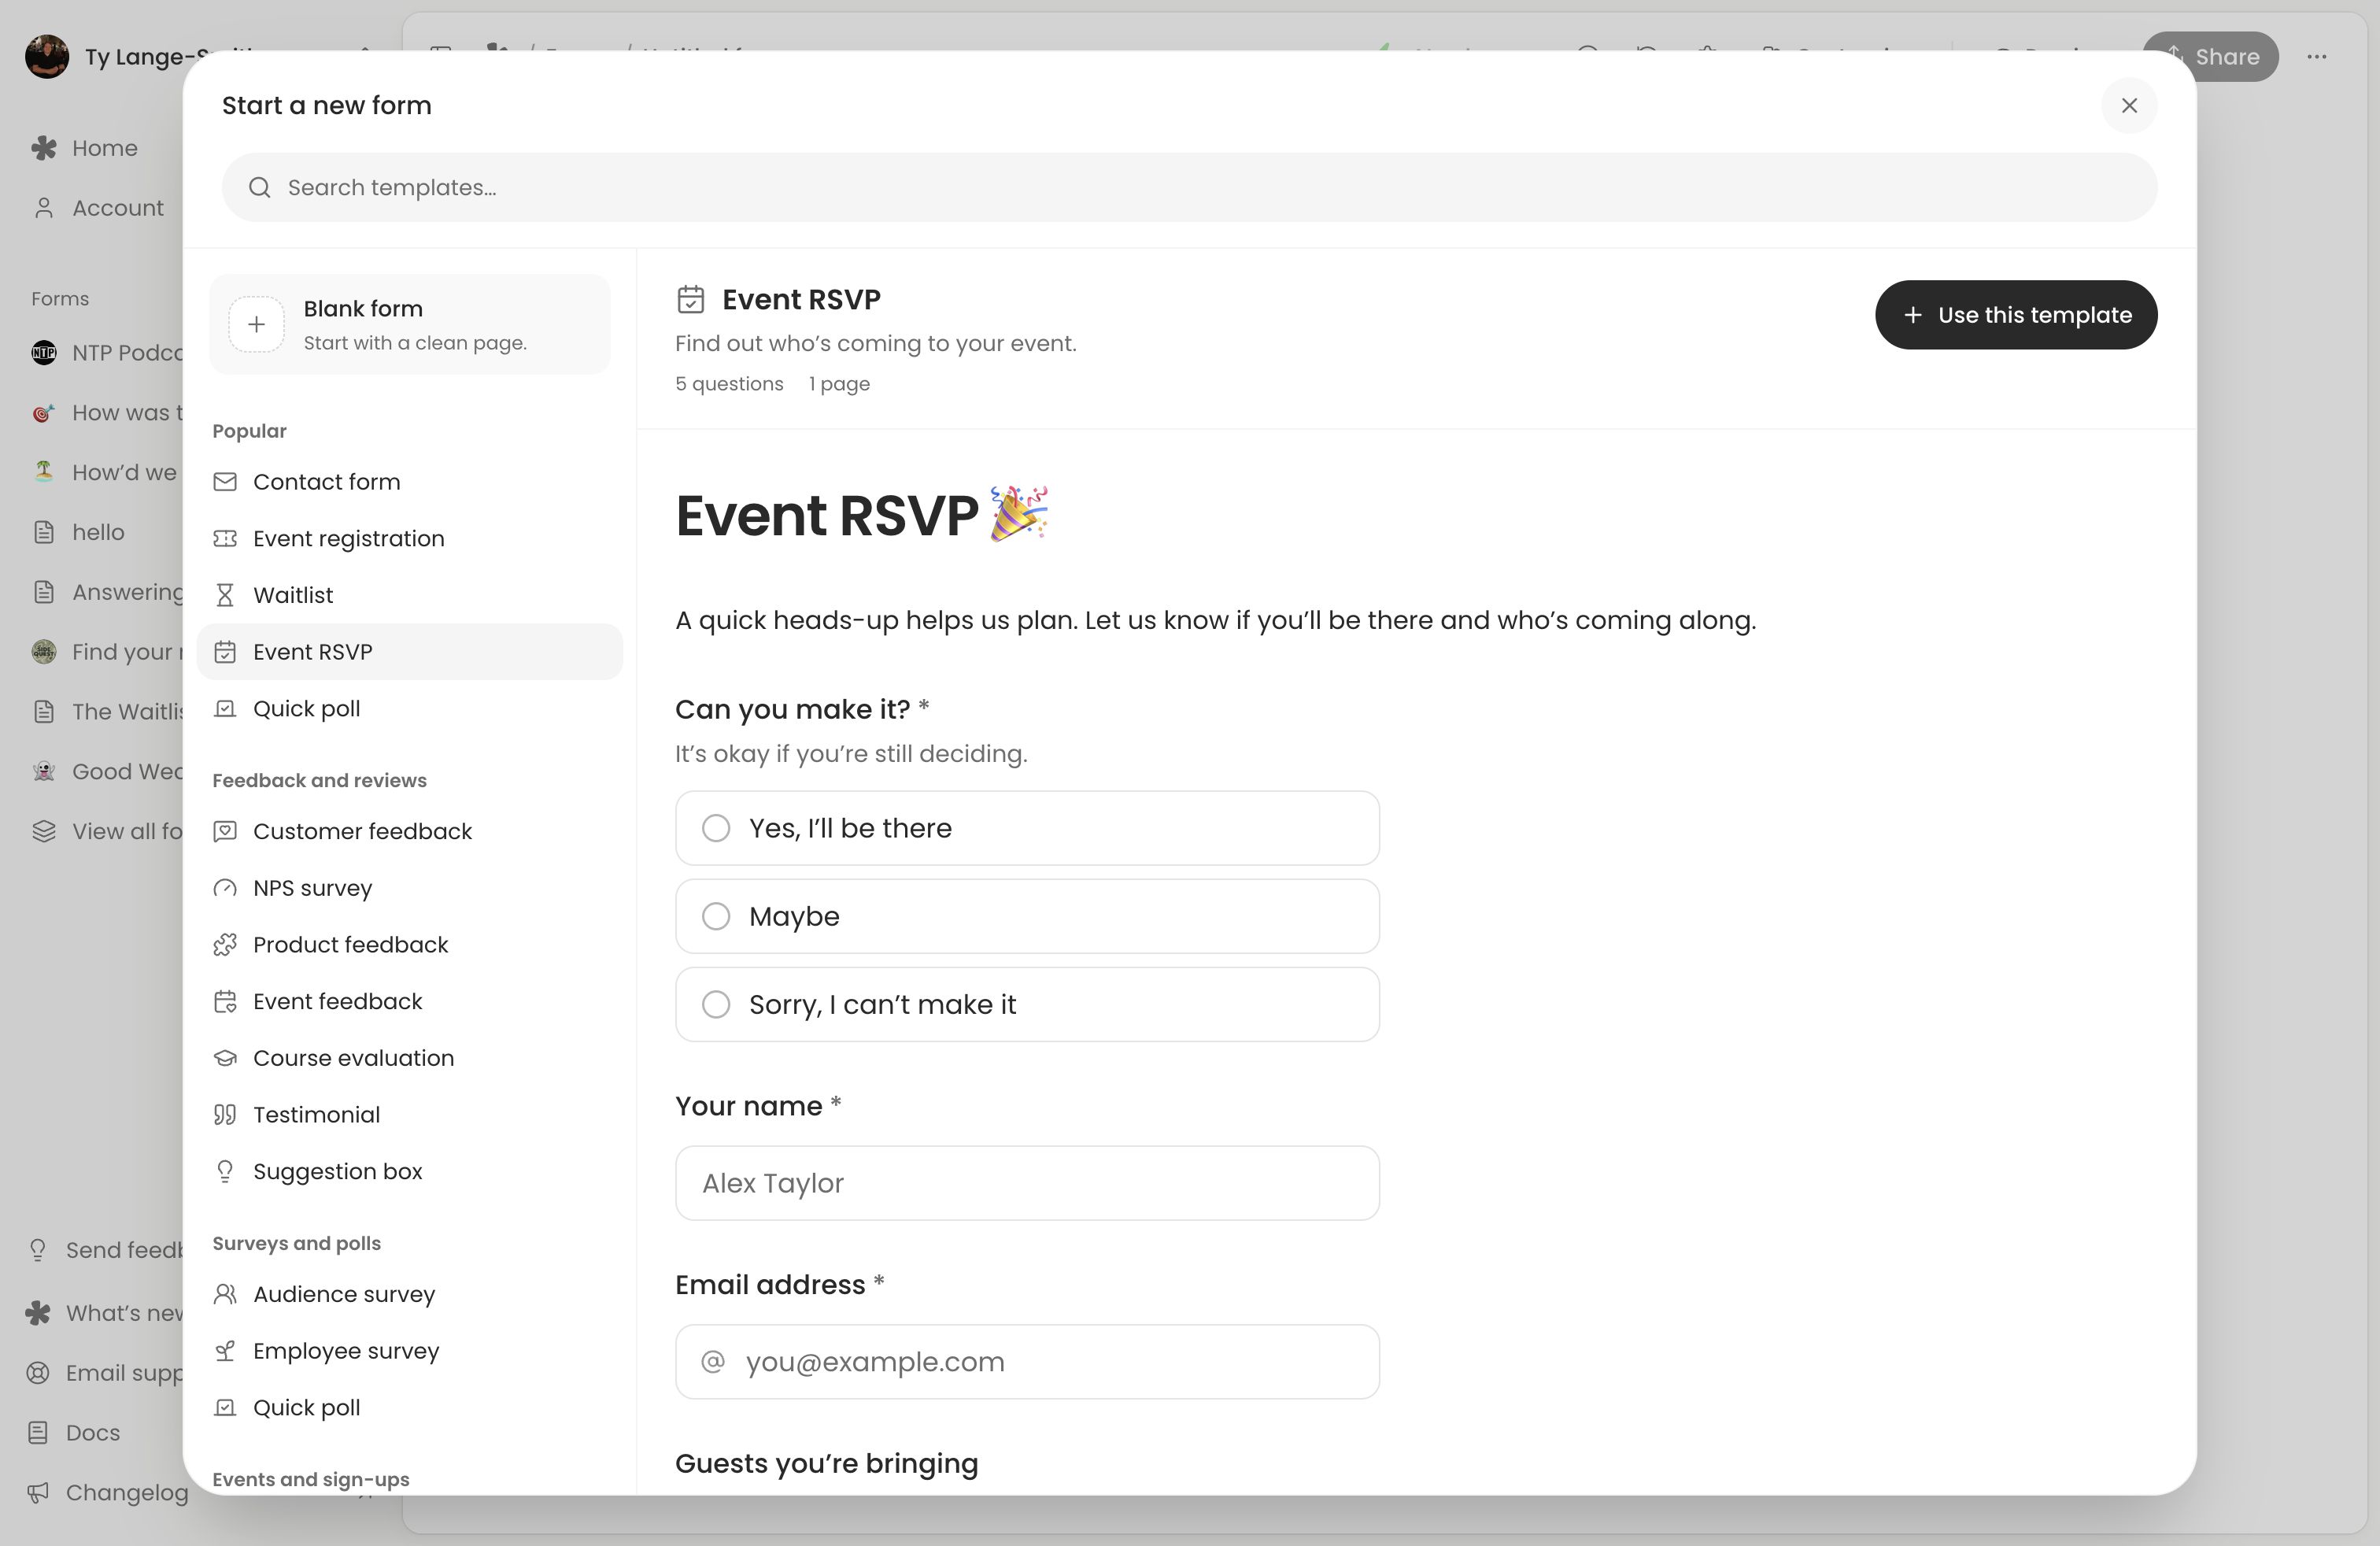
Start with the Event RSVP template. Replace the introduction with your event name, date, location and reply deadline. The template includes:
- Can you make it? with Yes, Maybe and No choices.
- Required name and email questions.
- Optional Guests you’re bringing, excluding the respondent themselves.
- Optional access or dietary information.
Keep the instructions for guests and access needs: people who cannot attend can leave those fields blank. The form does not automatically hide them based on the RSVP answer; conditional logic is coming soon.
Adapt the thank-you screen to explain the next step. This form collects replies; it does not sell tickets or automatically send a confirmation email. Confirmation emails and payments are coming soon.
Share the link or a tested QR code with your invitation. If each invitation should show a suggested name, keep that question Editable and create a personalised link on Creator, so people can correct it. Before planning numbers, choose Completed if the status filter is available, then download a CSV. Without a status filter, all listed responses are completed. Count Yes replies and their additional guests, and review Maybe replies separately. Read dietary and access requests in context rather than treating every submitted row as an attendee.
At your cutoff, turn off Accepting responses in Settings if you need to stop replies. This is a manual action; automatic closing on a date is coming soon. The link stays the same if you reopen the form.
Test before sharing
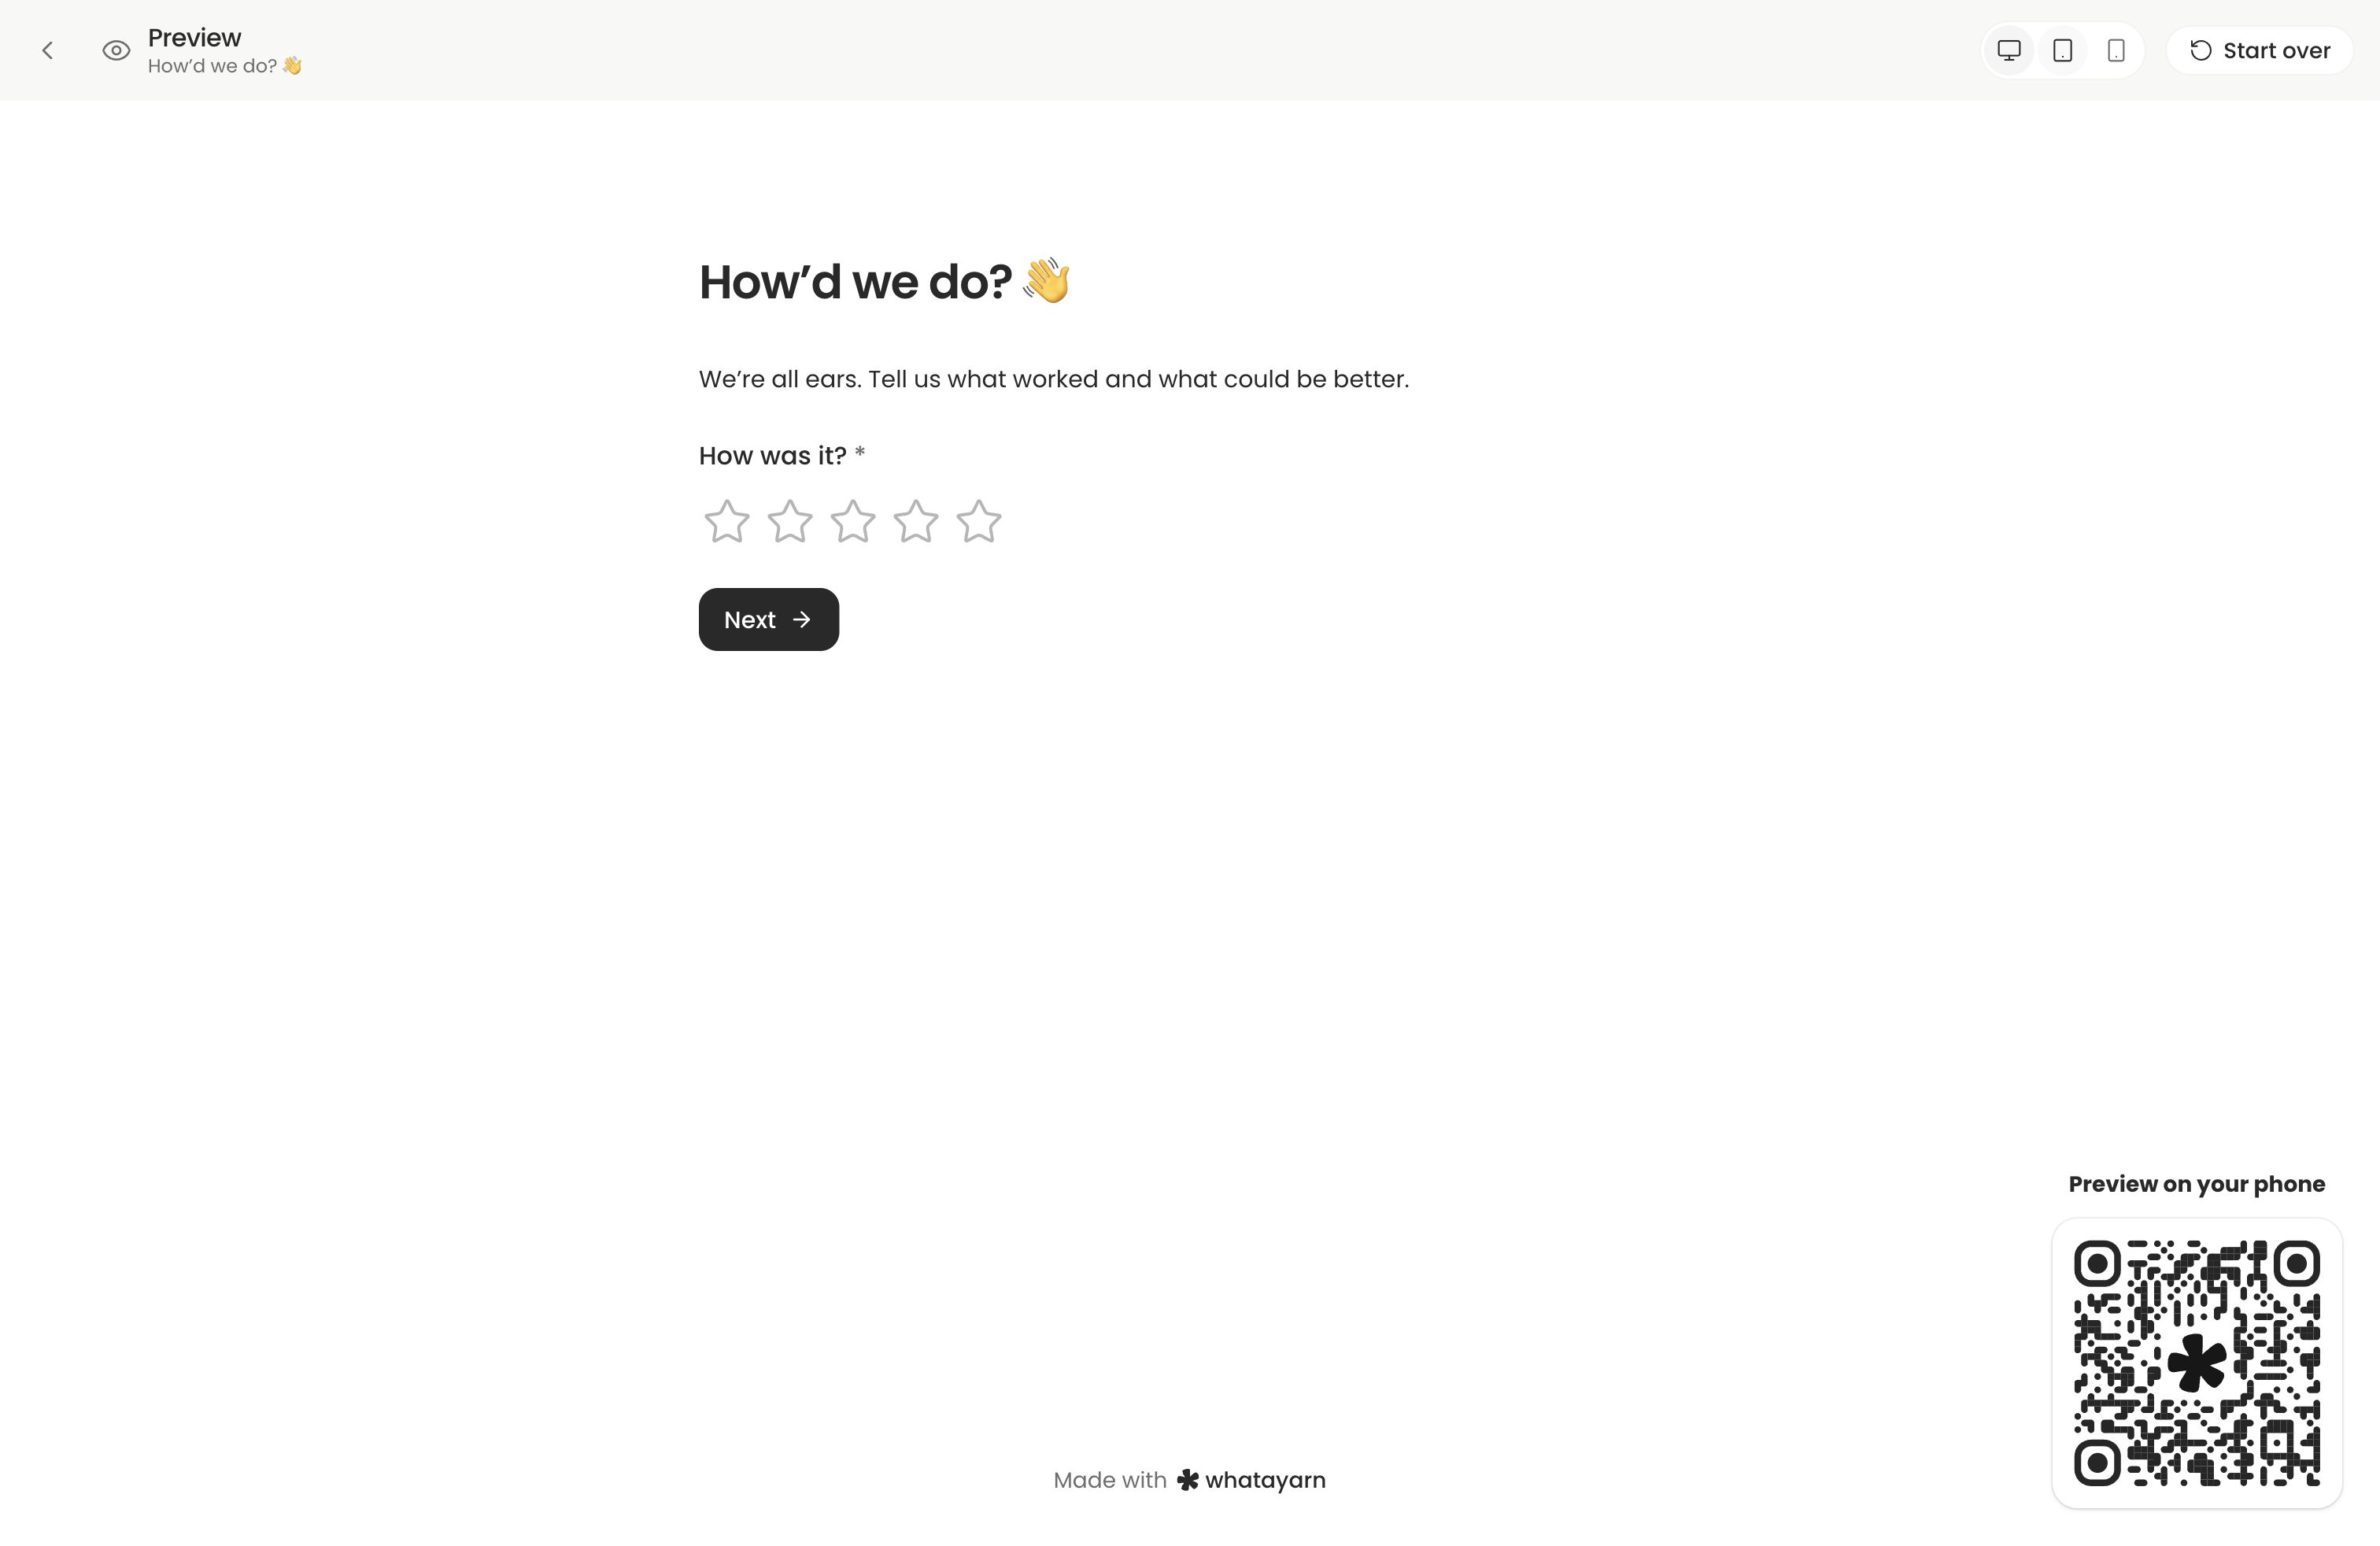
Open the live link on a phone and submit a realistic answer. Check required fields, any recording or upload limits, the thank-you screen and the response you received. Then publish later edits when you want them to reach respondents. Use form troubleshooting if the live form differs from the editor.
Next action: Choose Customer feedback, Contact form or Event RSVP, then complete a test submission before sharing it with your audience.